Quick answer: Bleed a floor jack only with no vehicle or load on it, on a level surface, using the procedure for the exact model. Fully lower the saddle, identify the release valve and the correct fill/vent plug from the manual, open the release valve as directed, cycle the handle the specified number of times, close the valve, restore the specified fluid level if required, and test through several unloaded lift-and-lower cycles. Do not turn a screw merely because it is near the pump; an overload or pressure-relief adjustment is not a bleed screw.
There is no universal stroke count or plug layout. For example, an older Arcan ALJ2T manual instructs the user to open the release valve and pump four full strokes, while another model may specify a different sequence. The correct procedure is the one printed for your model.
Does the jack need bleeding?
| Symptom | Trapped air is possible | Another fault is more likely |
|---|---|---|
| Spongy or irregular pumping after shipping or storage | Yes | Also check fluid level and release-valve position. |
| Lift arm will not reach full height without a load | Possible | Low fluid, an open valve, or internal wear may also cause it. |
| Visible hydraulic leak | Bleeding is not the repair | Remove the jack from service and inspect/repair it correctly. |
| Jack rises but creeps down under a permitted test load | Not a safe assumption | Valve or seal problems may be present; stop using it. |
| Bent frame, damaged wheel, cracked weld, or missing part | No | Mechanical damage requires removal from service. |
What you need
- The owner/service manual and exact model number.
- Eye protection and fluid-resistant gloves.
- Clean rags and a shallow catch tray.
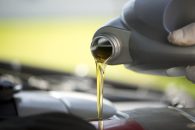
- The manufacturer-specified hydraulic jack oil, only if the level must be corrected.
- The correct tool for the documented fill/vent plug.
Keep dirt away from any opening. Do not use brake fluid, motor oil, transmission fluid, alcohol, or a “universal” fluid unless the jack manufacturer explicitly specifies it.
Manual-first bleeding procedure
1. Remove the jack from service
There must be no vehicle, stand, or other load on the saddle. Move the jack to a clean, firm, level surface. Fully lower the lift arm according to the manual.
2. Inspect before opening anything
Look for leaking fluid, damaged wheels, a bent arm or frame, loose hardware, corrosion, or an altered control. If the jack is damaged or leaks, bleeding is not a safe substitute for repair. Tag it out of service.
3. Identify every control from the diagram
Find the release valve and the fill/vent plug in the exact manual. Some power units also have factory-set safety or overload screws. Do not loosen an unidentified screw and do not change a pressure setting.
4. Check the required fluid state
Some procedures bleed with the fill plug installed; others tell the user to remove or vent it. Follow the model instructions. If checking level, keep the saddle fully down and the jack level. Add only clean specified oil to the stated level and avoid overfilling.
5. Purge the air
Open the release valve by the exact amount and direction stated in the manual. Pump the handle through the specified full strokes. Close the release valve without overtightening it. Never use pliers or an extension to force a valve that should operate by the handle.
6. Cycle the jack unloaded
Raise the arm smoothly toward its normal full travel without exceeding the stop, then lower it slowly. Repeat only as the manual directs. Watch for bubbles at an open fill port, changing fluid level, irregular motion, or leakage.
7. Restore and clean
Set the final fluid level as specified, reinstall the correct plug and seal, wipe away residue, and clean the saddle, handle, wheels, and work area. Recycle or handle spilled hydraulic oil under local rules.
8. Test before returning to service
First test full unloaded travel and controlled lowering. If the manual allows a test load, follow its method without entering the fall zone and without working under the load. The jack must lift smoothly, hold as specified, and lower predictably. Any leak, creep, abnormal noise, binding, or incomplete lift means it stays out of service.
Example: Arcan ALJ2T purge sequence
The ALJ2T manual provides a useful example of why model identity matters: with the release valve open, it calls for four rapid full pump strokes, then closing the valve and pumping the lift arm to full height. If the arm does not rise fully, the sequence is repeated or the troubleshooting instructions are followed. Do not apply that four-stroke number to a different model without its manual.
Problems bleeding will not fix
- External fluid leakage or a damaged reservoir.
- Worn pump seals, a faulty check/release valve, or a contaminated hydraulic passage.
- A bent lift arm, frame, handle socket, wheel, caster, or saddle.
- A missing or altered overload component.
- Using the wrong fluid or an incorrect fill level.
- A jack that cannot hold a permitted test load or lowers unpredictably.
Use the hydraulic-oil refill guide only after confirming the correct fluid and level. For broader care, see floor-jack maintenance and repair-versus-replace decisions.
Before the next vehicle lift
Bleeding restores normal hydraulic response only when trapped air is the cause; it does not turn a jack into a support device. Inspect it again, verify the capacity label, and follow the floor-jack safety checklist. After lifting, immediately support the vehicle with correctly rated stands.
Sources
- Arcan ALJ2T operating manual—air purge, fluid, inspection, and troubleshooting
- Arcan XL20 user manual and hydraulic maintenance guide
- OSHA inspection, maintenance, capacity, and out-of-service requirements for jacks
If the correct manual cannot be identified, contact the jack manufacturer or a qualified hydraulic service center rather than experimenting with valves or plugs.